Your storm
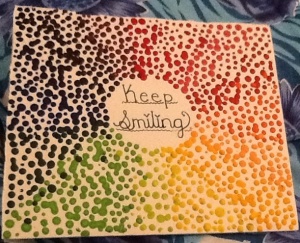
“Keep Smiling” dot art
Here is a piece that I, Happy Creator, just finished. It was very exciting and easy to make, and turned out exactly the way I wanted it to! To make it, I just followed the steps of melting my crayon, and used multiple different colors for a cool rainbow look. Just remember to leave a good amount of space in the middle for writing anything!
Abstract pendant
Paint chip ornaments
Chevron tutorial!
Okay, everyone! Now I am going to tell you how to make the chevron melted crayon project! The things that you will need are: poster or canvas (size depends on how big you want to make the project), crayons, candle, and tape. You should be able to find these things at any local store, or maybe even your house. The tape is optional- it helps the dots stay in their rows, so if you are making this for a present or something you might want to stick tape in the middle of the rows to make it look nice and neat. Now, as soon as you have everything layed out and you are ready to start the actual melting, pick your crayon color that you want to start melting first. Peel the wrapper off. After that, light up your candle and make sure you are in an open area like your backyard, and there are no people around you. And don’t forget to have newspaper or something to cover the ground, if you are doing this project indoors! Lift the crayon above the candle, not touching it, but pretty close to the flame. Keep it there until you can see the wax about to drip. Quickly put your crayon over the area where you want it to drop. Know that you will sometimes need to heat up the crayon every time before letting it drip. Continue doing this with all your crayons, and let it dry before taking the tape off of the board. Trust me, you will feel SO proud and satisfied once it’s done! Please leave a comment about this project, how my tutorial helped you and how creative you think it is!! If you really liked it please reccomend it to a friend, and become a subscriber- there are lots more crafts coming up!
Hope you liked it,
Happy Creator


